14 tips to help you fix OneDrive sync problems on Windows 10
When you're facing OneDrive syncing issues, it's likely to be a problem with the desktop client. In this guide, we'll show you the steps to troubleshoot and fix the problem.
All the latest news, reviews, and guides for Windows and Xbox diehards.
You are now subscribed
Your newsletter sign-up was successful
13. How to fix sync problems with OneDrive reinstalling app
Alternatively, you can also uninstall and install the app again on your computer to resolve syncing problems with OneDrive on Windows 10.
Uninstalling OneDrive
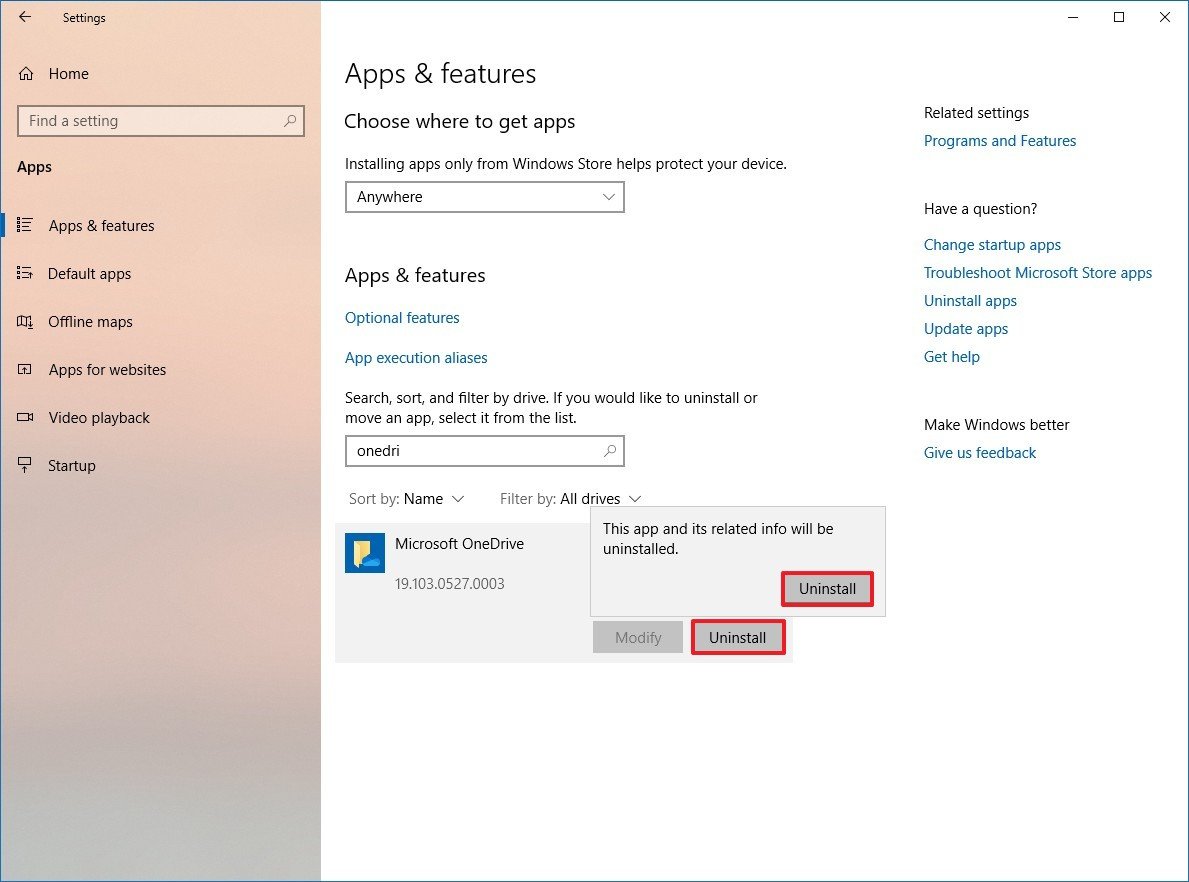
To remove OneDrive from Windows 10, use these steps:
- Open Settings.
- Click on Apps.
- Click on Apps & features.
- Under the "Apps & features" section, select the OneDrive app.
- Click the Uninstall button.
- Click the Uninstall button again.
Once you complete the steps, OneDrive will be removed from your computer.
Installing OneDrive
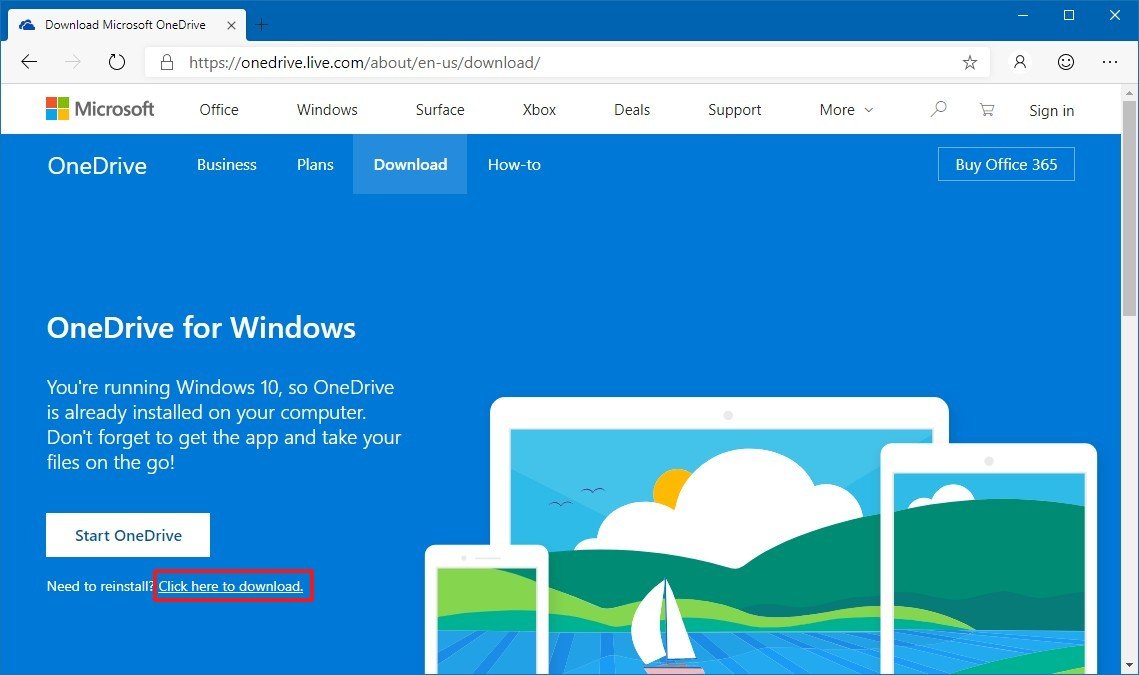
To install OneDrive on Windows 10, use these steps:
- Open the OneDrive website.
- Under the "Start OneDrive" button, click the Click here to download link and save the file.
- Double-click the OneDriveSetup.exe to launch the installer.Quick tip: If the computer is using the latest version, the setup will end automatically.
- Open Start.
- Search for OneDrive, click the top result to launch the app.
After you complete the steps, the installer will add the most up-to-date version of OneDrive, hopefully fixing the syncing issues.
Alternatively, if the latest version of OneDrive isn't working, you can join the OneDrive preview program to try out the latest pre-release of sync issue that may include a fix for the problem you're facing.
All the latest news, reviews, and guides for Windows and Xbox diehards.

Mauro Huculak has been a Windows How-To Expert contributor for WindowsCentral.com for nearly a decade and has over 22 years of combined experience in IT and technical writing. He holds various professional certifications from Microsoft, Cisco, VMware, and CompTIA and has been recognized as a Microsoft MVP for many years.


